

How to Fix your Butt Wink


How do I fix my butt wink? This is a common question I get when working with athletes in the clinic who program deep squats into their workout routine. The butt wink refers to excessive posterior pelvic tilt or lumbar flexion at the bottom of your squat. Before getting into assessments and mechanisms of how to fix your butt wink, I would like to start by saying you should expect a certain amount of posterior pelvic tilt when getting into the bottom of your squat. The most important thing to assess is: does the posterior pelvic tilt lead to excessive lumbar flexion OR is the spine still able to maintain a neutral position. If you are still able to maintain a neutral lumbar spine, the butt wink is something I wouldn’t worry about. If you have excessive lumbar flexion you could possibly be at increased risk of pain and/or lose the ability to produce maximum force out of the bottom of your squat.


A butt wink can be caused by multiple things, so before fixing it you need to figure out why it is happening. I will point out, if you are having a good amount of pain in your anterior hip or lower back, you might want to see a Physical Therapist first. If not, the two main areas I see restrictions include: a mobility limitation and a motor control issue. Before assessing either of these areas, I like to have the athlete perform an air squat or goblet squat to determine if we can fix the issue by simply cuing the athlete. Sometimes by just educating and giving the athlete feedback, they can fix the issue. If that is not the case, I like to start by screening for mobility. I will screen for mobility the same way I do for anyone struggling with the squat. I will start at the ankle and work my way up the chain.
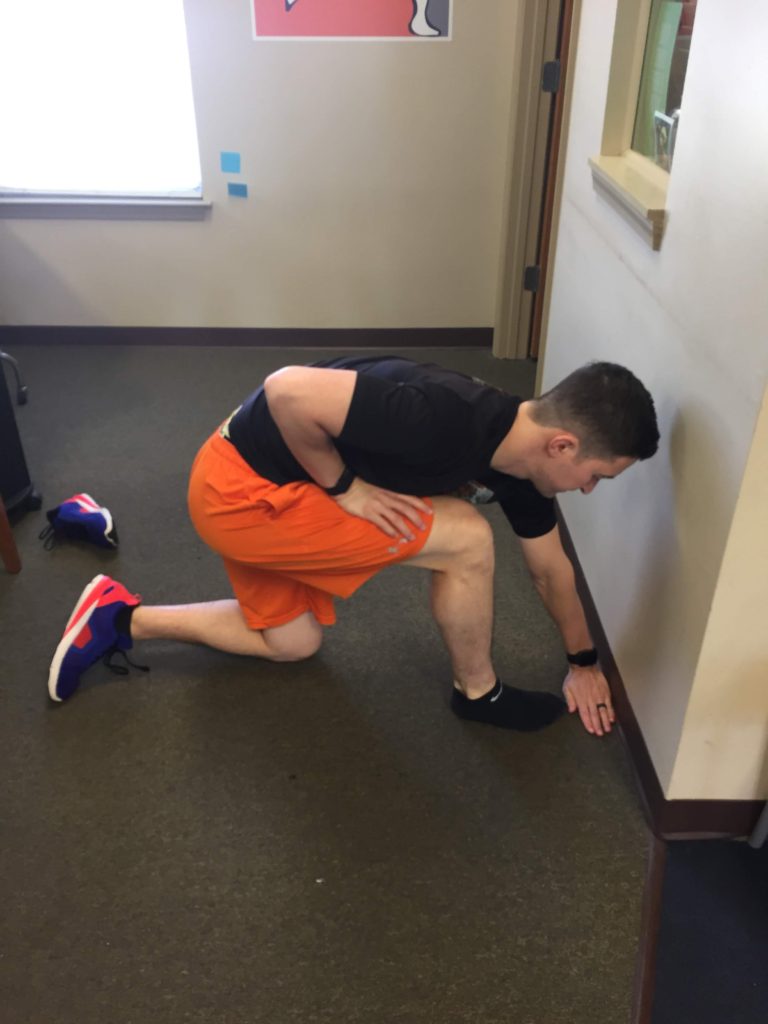
If you want a breakdown of how I have my athletes assess their ankle dorsiflexion, you can look back at my old post. I like to use the 1/2 kneeling dorsiflexion assessment against the wall. Ideally, I would like my athletes to have 4 inches (or one hand width) between their toes and the wall. This will provide enough dorsiflexion to perform a deep squat for most individuals.

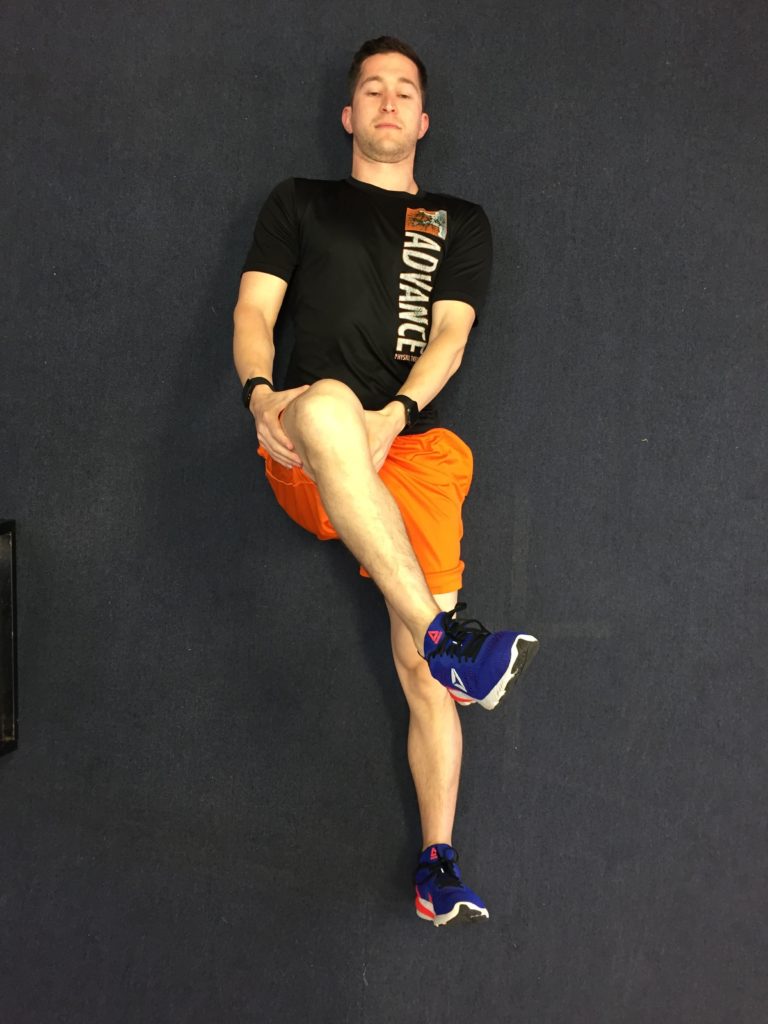
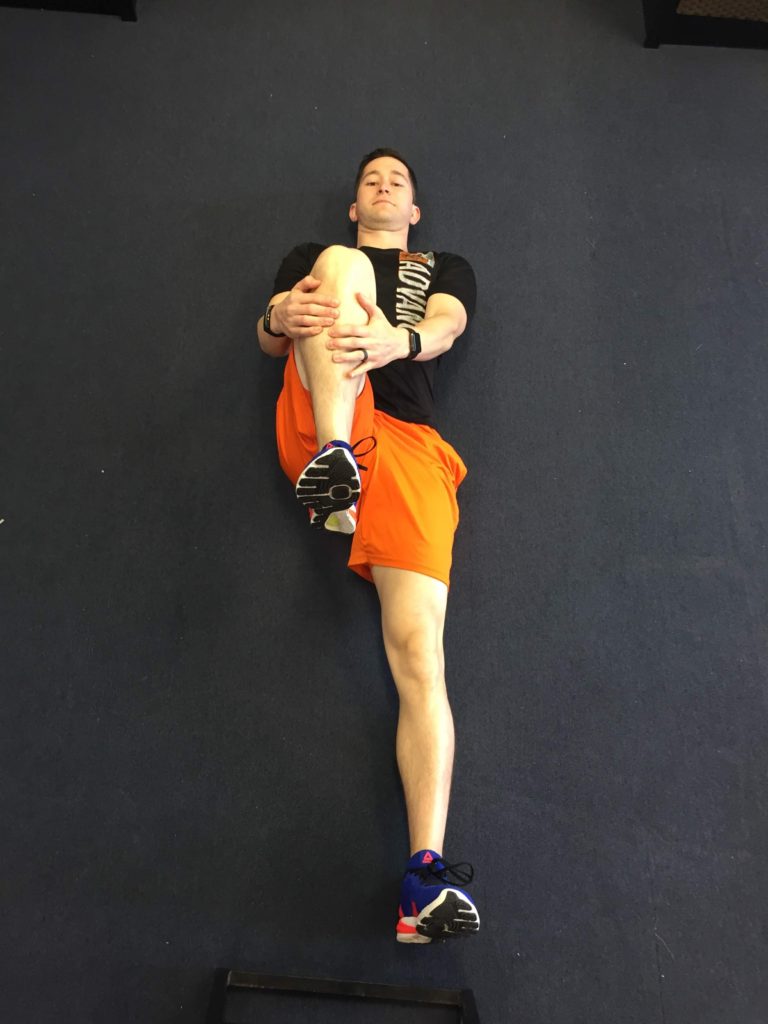
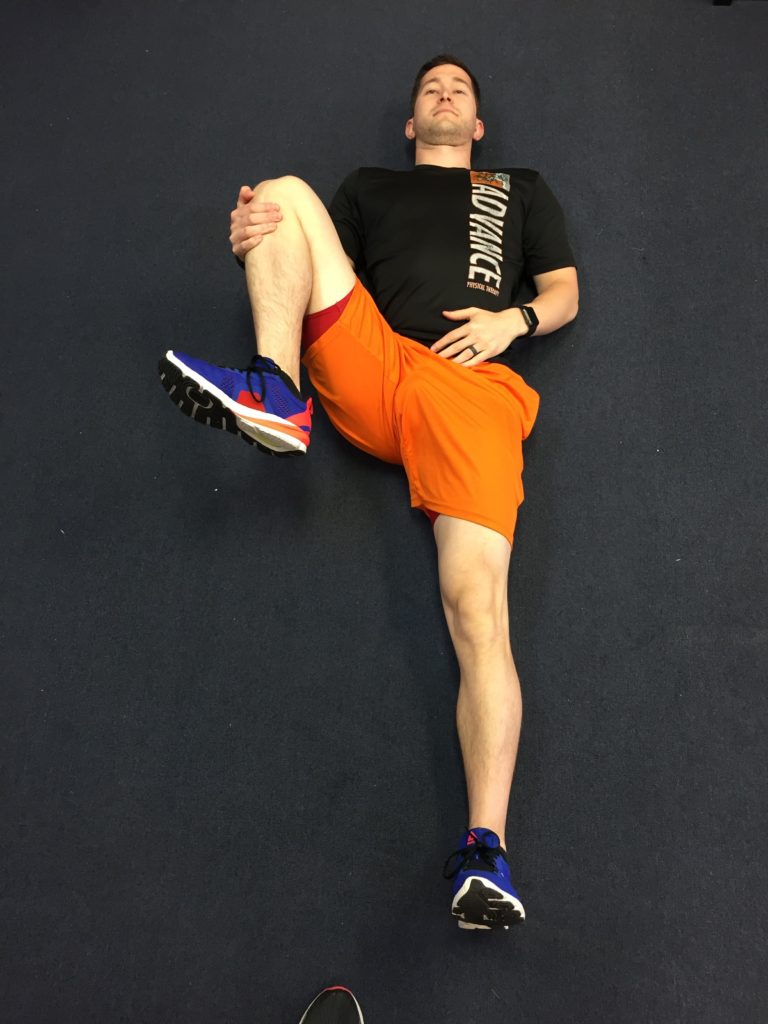
If you pass the dorsiflexion test I like to check knee and hip flexion. While on your back, pull your knees toward your chest. If your thighs can hit your stomach you should have enough hip and knee flexion needed. If you cannot hit your stomach then change your hand position and pull from the hamstring instead of the shins. If your hip mobility improves, it is most likely a knee flexion limitation. If you are still limited, it is probably coming from your hips.


My next step is checking internal and external rotation of the hip. I like to do this manually, however if you do not have a licensed PT or someone who is credentialed to put their hands on you, you can attempt to do this with a band or using a rig to keep your leg in a stable position. You want to start with 90 degrees of hip and knee flexion. Next you will rotate your foot inward (for external rotation) and outward (for internal rotation). External rotation should typically be around 45 degrees and internal rotation should be around 30 degrees.

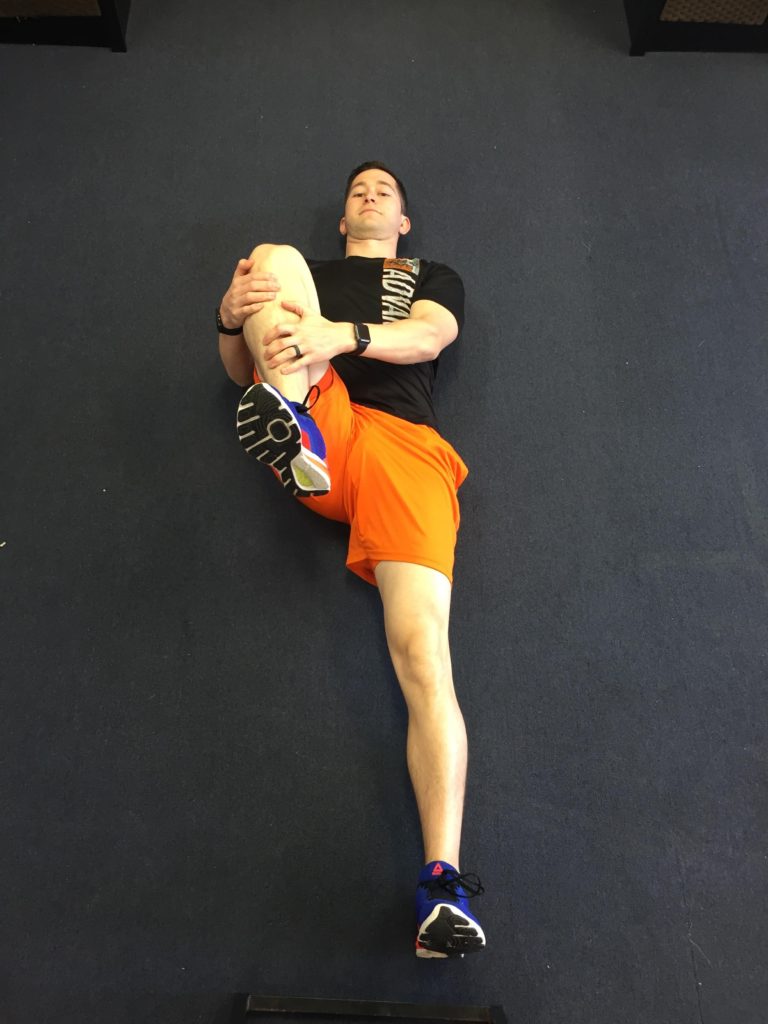
Another important topic that I will dive deeper into with a later post, is finding your optimal squat stance. An easy self assessment includes pulling your knee toward your chest and progressively moving your knee further away from mid-line. If you find a area where your knee has significantly more motion, this should be your hip angle when you squat. Given the differences with bony structures, each individuals optimal squat stance will be different. Some people will have full mobility throughout this test. If this is the case you can play with your stance and find the position you feel the strongest.
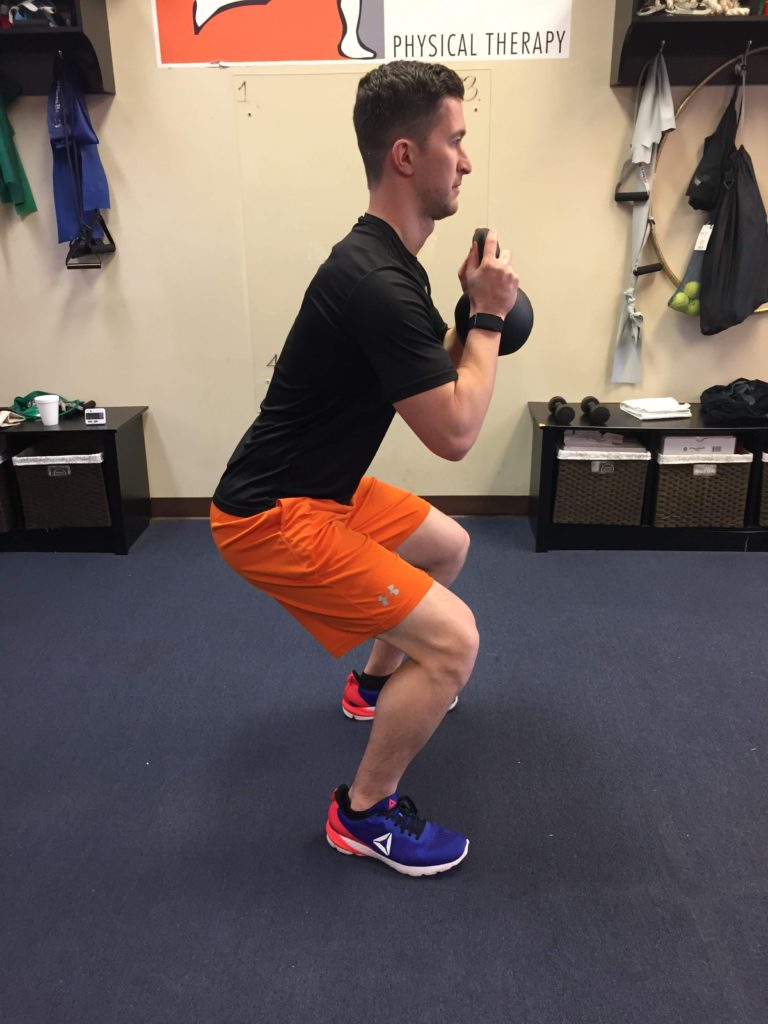
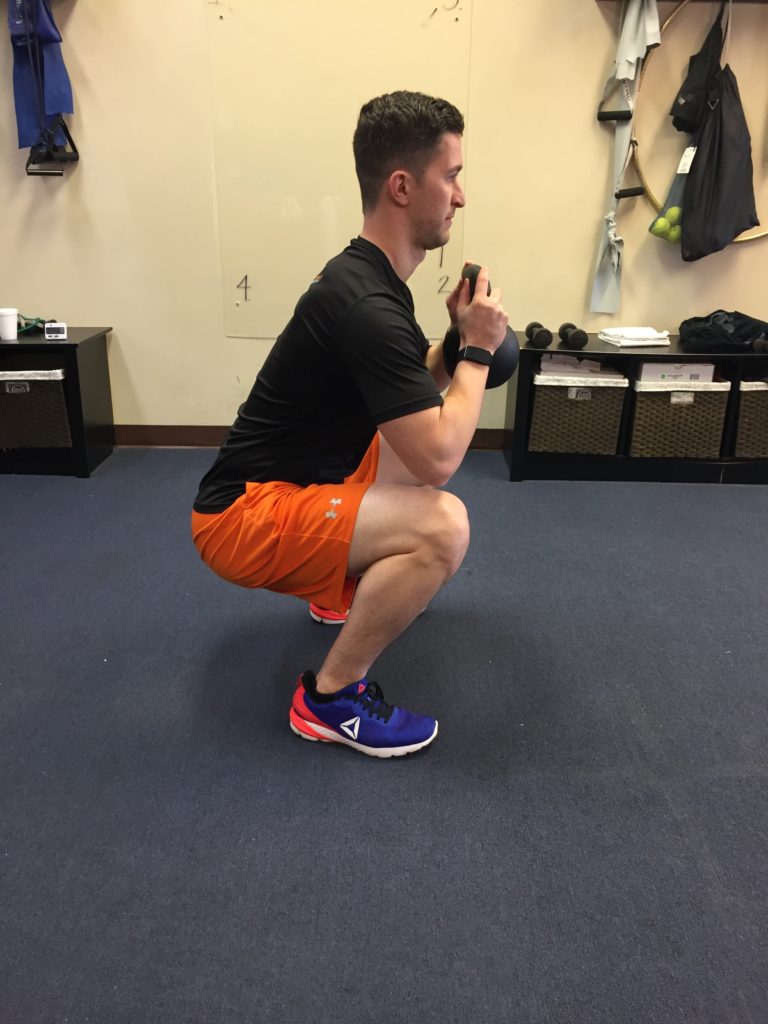
If you pass all the tests above mobility is probably not your issue. Next you need to look at motor control. This is basically assessing your bodies ability to control itself throughout the movement. Your core should be able to brace a neutral spine throughout the bottom of the squat. If you lose tension closer to full depth, work on incorporating isometric drills right above the butt wink. Once you build up your stability, slowly progress lower.

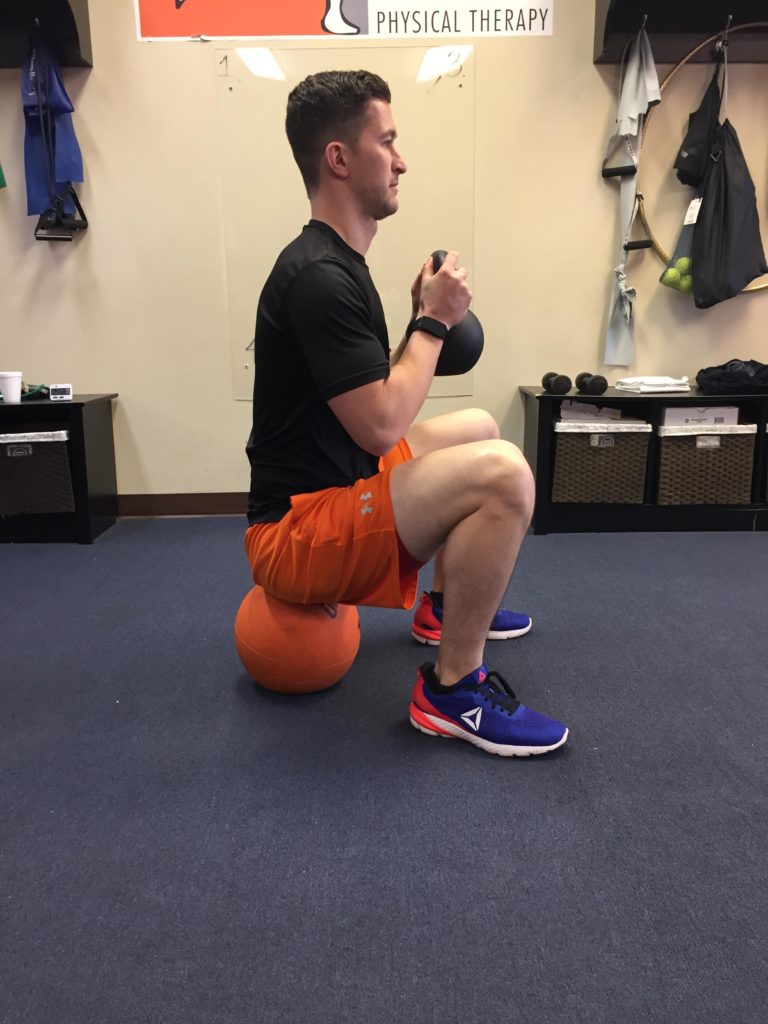
You can also work from the bottom up by performing isometric lifts offs. Start by sitting on a plyo box or ball that is around the height you lose neutral spine. Brace and lift off, holding a isometric right above the plyo/ball. Using a mirror might help your ability to notice the changes in alignment.

These are a couple areas I will check first when assessing loss of neutral spine during a squat. If you are still having issues after running through this checklist feel free to reach out with any questions. I hope this was helpful!
Mick Janusko, PT, DPT, MTC, CSCS
Recent Comments